Showing posts with label Seed Starting. Show all posts

Thursday, March 24, 2016

Touching God

I'm not a normal gardener. A tingling warmth radiated through my whole body. As the seeds were separated and anchored to the moist soil with a toothpick, the sensations increased. Touching the seeds and all of their glorious potential was like touching God.

The seeds were from 2013, salvaged from the summer before we sold our house in Portland and moved to Bend. Tomatoes had been cut. A few of their juicy seeds had been spread on a swatch of paper towel and left to dry. The tomato names were marked on the corner. These precious seeds of my most favorite tomatoes were now in my hand. A dozen or so seeds were torn off the scrap of towel (saving a few) and the extra layer of paper was removed. With the towel folded seeds-inward, they would be protected for the next step: nine minutes under my tongue. The seeds hydrated with my saliva. They are gathering my DNA information. Nine minutes is enough time to remember the beauty and bounty of their last harvest, the zinging flavor, the vibrant color, the magnificent blessing of the Divine in tomato form. And I prayed. After the allotted time, I stood outside, seeds now in my hands and held up to the sky to receive their time/date stamp. Two more notes for the seeds as they launch into their life: my breath and being cupped in the energy of my hands. These seeds now know more about me than I do about myself, and they are ready to be planted and to grow to be of superb service to my body. (Will not water the seeds for three days, giving them time to completely absorb my information.)
Waiting now for the seeds to stretch out their knowing into leaves and roots.

It has been several long years since I've partnered with the Divine in planting my tomatoes. When I was finished, I could barely speak, having felt the hand of God moving through me and blessing the harvest to come.

This is an experiment recommended for you to try at home! May you be blessed!

(The above planting ideas came from Ringing Cedars of Russia  by Vladamir Megre'.)


Wednesday, September 25, 2013

Savior of the Garden

The flowers of summer are gone.  If it weren't for the Rudebeckia, there would be no color in the yard--the Rudebeckia and the Zinnias.  The seeds for the Zinnias were started late, so instead of the plants finishing off the season now, they are just now getting their second and third blossoms.  In spite of the wind and the rain, they are blooming, blazing and brilliant all over the yard.

Dried Zinnia


This is the third generation of seeds from a single gifted plant two years ago.  Last fall I saved the most developed bloom of the most Righteous Red I could find in the yard.  All winter the wad of brown, twisted shards dried and waited.

Arrow-shaped seed still attached to the dried petal


Then finally it showed up on the list of Things I get to do today:  extract the seeds.  In that process, the Zinnia held a surprise for me:  the seeds were attached to the petals!  I know little about Zinnias except that their intensely brilliant color thrills my soul.  I certainly never knew this.


Among the beans


The odd, shard-like seeds found soil, sprouted into seedlings, and then were tucked into all the places of bare earth around the yard and garden.  And now the payback!  On a grey, rainy day, Righteous Reds reign as the savior of the season.


Lining the front walk.


Tuesday, October 30, 2012

Converted

Unconverted Bean Vines
In our family that word meant "met the Lord.  Saw the light."  But as Things I get to do today see the light (of day) slipping away, Fall falling all around us and Winter dropping in not far behind, I find myself highly motivated to convert one garden bed into it's fall-winter-spring green house.


Vines gone, shelves installed


Last spring was the first time the zippers (of the cover) and studs (of the structure) came together making a safe haven for seeds, tender shoots and baby plants.  The translucent covering over the vertical garden frame was a raving success.  Today they meet again.  There are lettuces to be transplanted into the soil beneath.  Geraniums would like to carry on instead of being snuffed out by frost in November.  There'll be away to fit them in, too.  I'm already itching to start seeds put into their labeled packages only weeks (days) ago.  Common sense will help me wait till spring.
For Halloween
Garden Ghost with a very faint pumpkin
in its belly


As I look out tonight it's apparent that the garden bed has moved from green house to ghost all in one week.  Now that's a conversion!


Thursday, July 5, 2012

Sunflower Sassy

It's a valiant sunflower, at least.  At its best, it's a symbol of determination and hope.  Check out Cup on the Bus by Joanne.  First of the Things I get to do today is pay tribute to this valiant sunflower and to Joanne for her love of the underdog.  Her adopted sunflower certainly has all odds against it.

The pale one that won my heart


All my sunflowers are rooting for the fire station flower.  From a wildflower seed mix last year, a very pale sunflower showed up in my garden.  I saved one small head of seeds and started them in an indoor tray in the spring.  They had all the luxuries of the wealthy--food, housing, water and protective attention.


First bloom--with a little green tongue


Not all the plants have bloomed true to the pale yellow of that first plant.  They are not slender, short and delicate structures either.  Something about having the initial strong, healthy start has allowed them to bloom, robust and tall.


A week later--full, stick-out-your-tongue attitude


They'd like to send their vigor and cheer to that lone flower in the East, growing in the crack of the concrete in front of the fire station door.  Just stick out your tongue at the odds and glow your heart out, little sunflower!

Saturday, April 28, 2012

Start with a Pink Bucket

1.  Equipment: Potting soil, newspaper,
wine bottle with straight sides.


It's been going on for days.  When the seedlings from the indoor nursery have moved to the outdoor greenhouse play pen and begin to get their legs, it's time for their own pot.


2. Take a section of the newspaper, cut off the fold (paper cutter
is great), cut the sheet in half vertically so your resulting
sheets are about 5 1/2 x 23".  Wrap paper around the bottom
end of the wine bottle covering about 3" of the bottle.


I'm such a tender-hearted fool.  Not one of all the seeds stuffed into one tomato-seed hole failed to take hold.  And who am I to cut them off after such valiant effort?  Not me.


3. You want enough paper hanging over to fold/moosh into the
center cavity to "secure" the bottom.  Gently slide out the bottle.


The arithmetic tells the story: planning on 9 Oregon Spring Bush tomato plants--9 holes times 4 seeds equals 36.  And that is the way it went for nearly all the seeds I started. So I've been potting up tomatoes, cucumbers, zinnias, eggplant and peppers--114 all together--I just counted them.  It's taken days to settle them all in.
4. Quickly add a generous scoop of soil before the paper
changes its mind and decides to be flat again.


A meditative process, it is, scooping out the little clump of plants, talking to them sweetly and tugging gently to separate them from each other, then tucking them snugly into their new homes.  And that is where the rub comes: new homes for 114 plants!  Don't think I've ever had that many little pots to reuse--maybe if I'd saved them for ten years, but I haven't.

5. Add your seedling, more soil to snuggle it in.  Press it down
to remove air cavities around the roots.  Water lightly.


Here's where the straight wine bottle is a huge help.  First you drink whatever is left in the bottle.  Then, if you are able, follow the rest of the instructions--the pictures will help no matter what state you are now in.


6. These lettuce boxes hold six plants nicely and help keep the
sides of the pots moist.  WARNING:  this type of pot dries out
 rather quickly.  Keep an eye on them and water as needed.


 You really must begin with a pink bucket.


Monday, April 9, 2012

From Nursery to Play Pen

Cucumbers stretching out their second set of leaves


My, my! Don't they grow up fast! Every parent has probably thought their babies matured faster than average at some point.  No exceptions here.


"Galina" tomatoes headed toward 5th & 6th leaves


I was away for the weekend visiting my real baby who is now 27.  And while I was not looking, the plant nursery exploded.  It turns out that the first of the Things I get to do today now that I'm back at home is move the babies from the nursery into the play pen.


Baby pale-yellow sunflower--can you see its shining face?


There is a bit of high overcast sun today so their first day exposed to its light is soft and gentle.  Nervous first-time-this-spring mother that I am, all the rest of the things I get to do today will come between checking and rechecking on how the little ones are liking their baby steps.

Playpen with happy babies airing in the sun

Sunday, April 8, 2012

Making Babies: The Blessed Event


Still, still, my beating heart.  After waiting nearly a week, I sneak into the nursery to see if any babies have yet peeked out of their compost beds.  And there, there are tomatoes coming up--slender leaves tied at the top with the seed husk, pointy green leaves spread wide.


This sunflower sprout knows everything about
becoming a pale yellow beauty
A juicy, tender cucumber in its early stages


These seeds were not too old, of course, just last year's packet.  And for several days nearly all the Things I get to do today revolve around checking for yet one more healthy baby to pop out of the soil in its own way: slender, thread-necked tomatoes, chunky-necked cucumbers, plump-necked sunflowers.


Righteous Red Zinnia


Seeds that are six-years old are showing green leaves and white necks, and I am thrilled.  So much life is still in that little brown speck--the wisdom to make a huge plant with dozens of tomatoes.


My heart beats in appreciation for this miracle--the miracle of birth and resurrection.


Saturday, April 7, 2012

Making Babies: Planting

You have to have seeds if you are going to plant them.  Duh!  Well, maybe you could have figured that out, but it certainly caught me by surprise.  Things I get to do today said, "plant warmth-needing seeds," and I had not bothered to buy any.  I didn't even really know for sure what types I wanted to start.

In a bit of a dither, I shuffled through the stack of seed catalogs until the most familiar name appeared.  Page after page were filled with mouth-watering descriptions of the finest growies on earth.  I circled and checked far more than my garden could hold.  Finally, my wits crept back to me, and I thought of checking my left-over seeds from last season.


Amazing!  There in my hands were several packets of certainly-cannot-live-without-this-one seeds I had just circled in the catalog--even the same company.  Now this mama was really excited.  Rummaging through the backlog of seed packets produced everything I needed for the nursery starts: tomatoes (7 kinds), eggplant, sweet peppers, cucumbers (3 types), basil, a pale yellow sunflower and zinnias (big, brilliant red ones).


Little cribs in a nursery row


I planted all my old seeds--some from as far back as 2006--in sifted compost that I sterilized in our outdoor gas grill. Don't even think about doing it in your oven.


Lids to my baby "cribs" had labels that would shade
the young starts.  Pour very warm water over the plastic
underside of the label to soften the adhesive.
Makes removal quite easy.


Seed cribs with soft, compost mattresses and cozy, clear covers promise to grow very happy, healthy babies.  Now we wait (continued tomorrow).

Friday, April 6, 2012

Making Babies: The Nursery

A woman loves to create a nursery.  Picking out the necessary items to make a safe and cozy place for a baby is what we're all about.  Putting it together so it cuddles and supports new life is right up at the top of the bliss scale.

And as Handy Andy, I knew the nursery could not be at my biggest south-facing window in the dining room, and would, therefore, require more clever thought and planning.  That's when the parts of a 40-year-old plant shelf came to mind all the way from the far end of the attic.

Attached to the wall.
 Rungs on the vertical supports allow for
adjusting plant/light distance.


Assembled, the shelf could be fastened to the wall on either side of the available window (guest room unoccupied 99% of the time).


Secured to the ceiling
and wired to reach an electrical outlet.


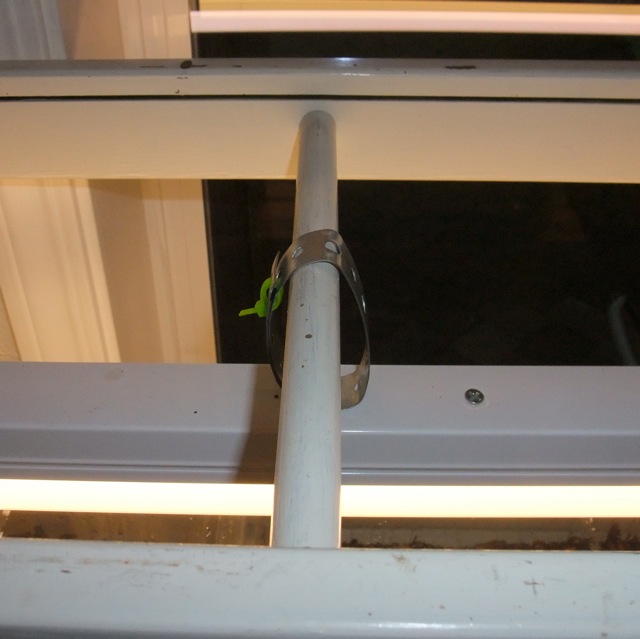
Essential grow lights could be attached to compensate for rainy days and a shaded west window.

Wired in


An 8-foot extension cord was used for wiring the lights together and allowing an easy way to turn them on and off.


Two "plumber's tape" straps secure each light fixture to
the rail shelves.


The nursery furniture is ready, and several weeks ago the most urgent item of the Things I get to do today list was plant seeds for those growies that need the head start indoors.(Continued tomorrow).


Saturday, March 24, 2012

Unzipped

I'd been putting it off.  A retired seamstress/dressmaker, I know what kind of fabrics give me pleasure in the handling and process of constructing a garment.  Supple, natural fibers that press nicely and release the fragrance of their origins delight me immensely.  Greenhouse fabric is woven plastic, stiff, unmoving except to slide around, and one would not ever press it.  The Things I get to do today must include having Handy Andy dressmaker  build one Big Mama Dress.

Vertical Garden* retrofit with shelves


Last fall one of the Vertical Garden frames I had built was modified to spend part of its yearly cycle as a greenhouse (see "Zippers and Studs" October 15, 2011).  The shelves are spaced for maximum solar benefit and, when the plant-baby season is over, can be removed to  allow growning-up plants a strong support.


"Fabric" 12' wide and 50' long--don't need that much


But the greenhouse comes first.  Out with the plans.  Remeasure the structure and check against plans. Unroll the fabric.  Measure.  Cut fronts (center and sides), sides and top/back. Install the zippers.  Cut vents.  No words are available to describe the sewing process except that it was way too close to a wrestling match.  No blood and no final bell, but I won--pinned that sucker to the mat (sewing machine) and ended up with the enclosing part of the greenhouse--though there was little satisfaction in the process.

How to get this over her "head"
Where is her head?


Amazingly, the "dress" fit the oddly built dame in the garden.


All snuggled up


All farmers know the basic rule "Make hay while the sun shines."  Get the structure up, then fill all the containers  with seeds eager to sprout and sing in the sunshine.


Unzipped to welcome the sun


Unzipped, the front rolled up, the south side provides a perfect setting for seed song.
Recycled lettuce tubs to be filled
with potting soil and seeds


*Vertical Gardening by Allen Fell, Rodale Press.